SSD Upgrade Guide: Boost Laptop Speed 50% DIY 2026
SSD Upgrade Guide: Boost Laptop Speed 50% DIY 2026
Is your once-speedy laptop now crawling through tasks? Do you find yourself staring at loading screens more often than your actual work? You’re not alone. Many users experience a significant slowdown in their laptops over time. While a complete system overhaul might seem like the only solution, there’s a far more cost-effective and surprisingly simple upgrade that can breathe new life into your aging machine: installing a Solid State Drive (SSD). In 2026, with SSD technology more affordable and efficient than ever, this DIY project is not just feasible but highly recommended.
This comprehensive guide will walk you through every step of an SSD upgrade laptop, from choosing the right drive to the final boot-up. We’ll show you how to boost your laptop’s speed by a remarkable 50% or even more, making it feel brand new without breaking the bank. Get ready to transform your old laptop into a responsive powerhouse!
Why an SSD Upgrade is the Ultimate Laptop Performance Booster
Before we dive into the ‘how-to,’ let’s understand ‘why.’ What makes an SSD so much better than the traditional Hard Disk Drive (HDD) that likely came with your laptop? The answer lies in their fundamental technology.
The Limitations of HDDs
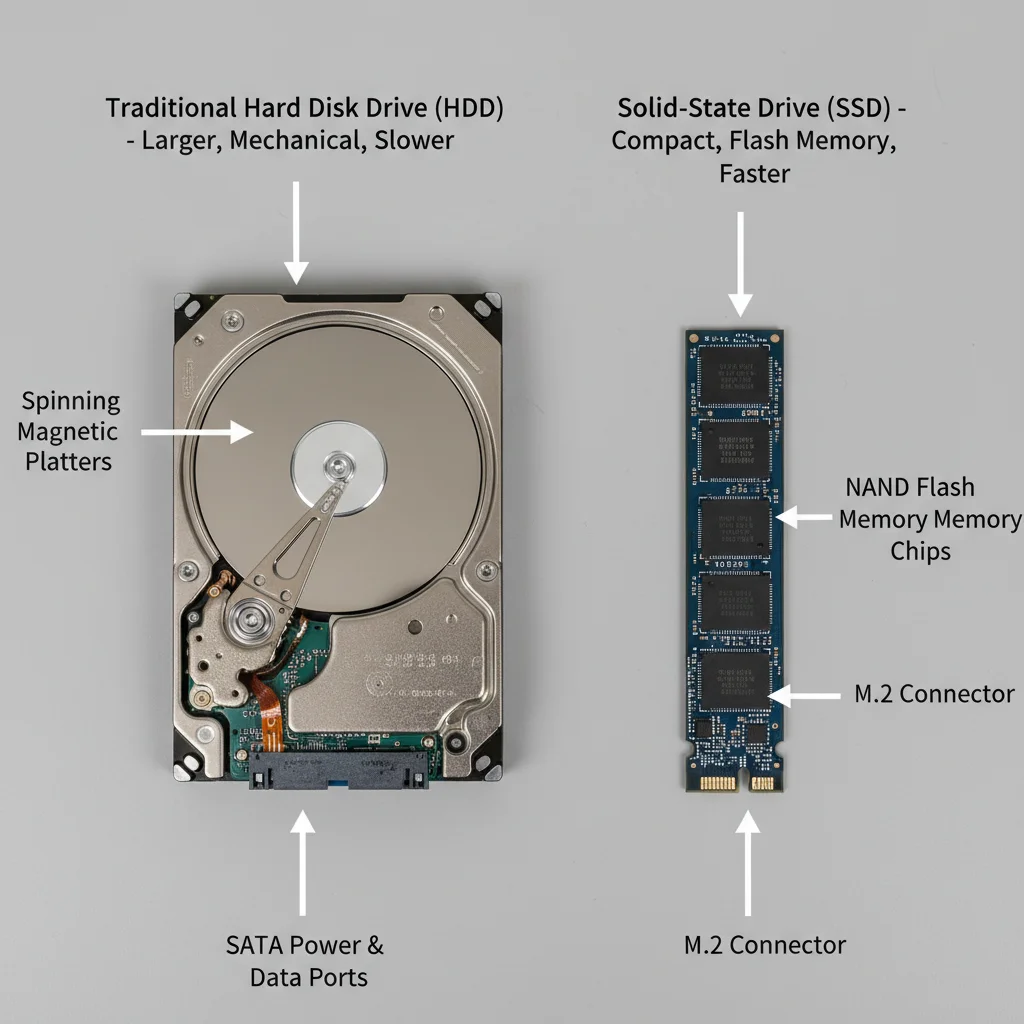
Traditional HDDs rely on spinning platters and read/write heads to access data. Think of it like a record player: the arm has to move to the right spot on the spinning record to play the music. This mechanical process is inherently slow. When your operating system, applications, and files are scattered across these platters, the read/write heads have to constantly move, leading to significant delays. This is the primary reason for slow boot times, sluggish application launches, and general system unresponsiveness in older laptops.
The Power of SSDs
SSDs, on the other hand, use flash memory to store data, similar to a giant USB stick. There are no moving parts. This means data can be accessed almost instantaneously, regardless of its location on the drive. The difference in speed is astounding. An SSD upgrade laptop can cut boot times from minutes to seconds, open demanding applications in a flash, and make multitasking feel fluid and effortless.
Beyond speed, SSDs offer other significant advantages:
- Durability: Without moving parts, SSDs are far more resistant to drops and shocks, making them ideal for portable devices like laptops.
- Energy Efficiency: SSDs consume less power than HDDs, which can translate to slightly longer battery life for your laptop.
- Silent Operation: No spinning platters means no noise. Your laptop will run quieter, especially under heavy load.
- Lighter Weight: SSDs are generally lighter than HDDs, further contributing to laptop portability.
The cumulative effect of these benefits is a dramatic improvement in user experience. For an old laptop struggling with performance, an SSD upgrade laptop is often the single most impactful modification you can make.
Identifying Your Laptop’s Compatibility: The First Step
Before you purchase an SSD, you need to determine what type and size of SSD your laptop supports. Most older laptops use 2.5-inch SATA HDDs, which are directly replaceable with 2.5-inch SATA SSDs. However, some newer or ultra-thin laptops might use M.2 or NVMe drives. Here’s how to check:
1. Consult Your Laptop’s Manual or Manufacturer’s Website
The most reliable source of information is your laptop’s official documentation. Look for specifications related to storage drives. It will usually specify the form factor (e.g., 2.5-inch, M.2 2280) and interface (e.g., SATA III, NVMe PCIe Gen3).
2. Physical Inspection (If Comfortable)
If you’re comfortable opening your laptop (ensure it’s powered off and disconnected from power), you can visually inspect the current drive. Most 2.5-inch HDDs are easily identifiable. If you see a smaller stick-like drive, it’s likely an M.2 or NVMe. Note down any labels or model numbers on the drive.
3. Use System Information Tools
- Windows: Press
Win + R, typemsinfo32, and press Enter. Navigate toComponents > Storage > Disks. Look for your drive’s model number and research it online to find its specifications. - macOS: Click the Apple menu, select
About This Mac, thenStorageorSystem Report > Storage. This will give you details about your current drive.
Key Considerations for SSD Type:
- SATA III (2.5-inch): This is the most common type for older laptops and offers excellent performance over HDDs.
- M.2 SATA: A smaller form factor (stick-like) that uses the SATA interface.
- NVMe (M.2 PCIe): The fastest type of SSD, offering significantly higher speeds than SATA. If your laptop supports NVMe, it’s a great choice, but older laptops often do not.
For an SSD upgrade laptop, ensure the new drive matches the physical dimensions and interface of your old drive or an available slot. For most older laptops, a 2.5-inch SATA SSD will be the direct replacement.
Choosing the Right SSD: Capacity and Brand
Once you know the compatible type, it’s time to choose your new SSD. Here’s what to consider:
Capacity: How Much Space Do You Need?
SSDs come in various capacities, typically starting from 120GB and going up to several terabytes. Consider your current usage and future needs:
- 120GB-250GB: Suitable if you primarily use cloud storage or have minimal local files. Good for a secondary drive or budget-conscious users.
- 500GB: A popular sweet spot for most users, offering ample space for the operating system, essential applications, and a decent amount of personal files.
- 1TB or More: Recommended for users with large media libraries, gamers, or professionals who need significant local storage.
Remember, SSDs perform best when they’re not completely full, so aim for a bit more capacity than your immediate needs.
Brand and Reliability
While most modern SSDs from reputable brands are reliable, some stand out. Look for brands like Samsung, Crucial, Western Digital, Kingston, and SanDisk. These manufacturers offer good performance, reliability, and often come with useful cloning software. Read reviews and compare prices to find the best value for your SSD upgrade laptop.
Essential Tools and Preparation for Your SSD Upgrade
Before you begin the physical installation, gather your tools and prepare your system. Proper preparation ensures a smooth and successful SSD upgrade laptop.
Tools You’ll Need:
- Small Phillips-head screwdriver: Most laptops use these.
- Plastic pry tool or guitar pick: Helpful for gently opening laptop casings without scratching.
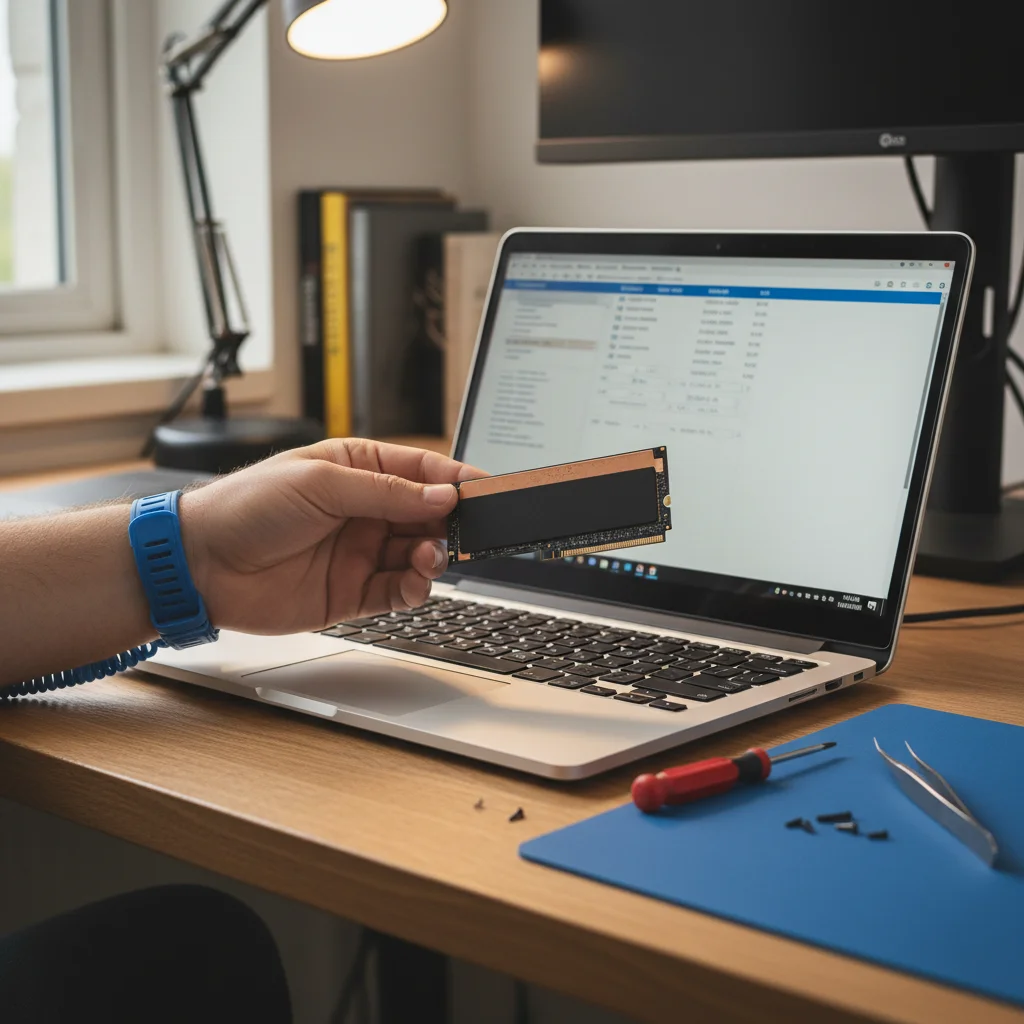
- Anti-static wrist strap: Highly recommended to prevent electrostatic discharge (ESD) from damaging sensitive components.
- External SSD enclosure or SATA to USB adapter: Essential for cloning your old drive to the new SSD before installation.
- New SSD: The star of the show!
- Optional: Tweezers (for small screws), magnetic mat (to keep screws organized).
Pre-Installation Checklist:
- Back Up Your Data: This is CRITICAL. While cloning software is generally reliable, always have a complete backup of your important files to an external drive or cloud storage.
- Clean Up Your Old Drive: Delete unnecessary files, uninstall unused programs, and empty your Recycle Bin. This reduces the amount of data to clone and can make the process faster.
- Charge Your Laptop Battery: Ensure your laptop has a full charge, or keep it plugged in during the cloning process to avoid interruptions.
- Download Cloning Software: Many SSD manufacturers (e.g., Samsung Data Migration, Crucial Acronis True Image for Crucial) provide free cloning software with their drives. Alternatively, there are third-party options like Macrium Reflect Free.
- Check for Firmware Updates: For your new SSD, check the manufacturer’s website for any available firmware updates. It’s often best to install these before the primary installation.
Taking the time for these preparatory steps will save you a lot of potential headaches during your SSD upgrade laptop.
Step-by-Step: Cloning Your Old Drive to the New SSD
Cloning your old drive means creating an exact copy of your operating system, programs, and files onto the new SSD. This saves you from having to reinstall Windows/macOS and all your applications from scratch.
1. Connect the New SSD
Use your external SSD enclosure or SATA to USB adapter to connect the new SSD to your laptop. Ensure it’s recognized by your operating system.
2. Install and Run Cloning Software
Install the cloning software you’ve chosen. Follow the on-screen instructions, which typically involve:
- Selecting your old HDD as the ‘source’ drive.
- Selecting your new SSD as the ‘destination’ drive.
- Confirming the operation.
Important: Double-check that you’ve selected the correct drives! Cloning to the wrong drive can lead to data loss.
3. Initiate the Cloning Process
Start the cloning. This process can take anywhere from 30 minutes to several hours, depending on the amount of data and the speed of your drives and USB connection. Do not interrupt the process. Your laptop might restart during cloning, which is normal.
4. Verify the Clone (Optional but Recommended)
Once cloning is complete, you can optionally verify the integrity of the cloned drive. Some software offers this feature. You can also try booting from the external SSD (if your BIOS/UEFI allows) to ensure it works before the physical swap.
With the cloning complete, your new SSD is now a mirror image of your old drive, ready for the physical swap. This is a crucial part of the SSD upgrade laptop process.
The Physical Swap: Installing the SSD in Your Laptop
This is where you physically replace the old HDD with the new SSD. Take your time and be gentle.
1. Power Down and Disconnect
Completely shut down your laptop. Disconnect the power adapter and remove the battery (if it’s easily removable). Hold the power button down for 10-15 seconds to discharge any residual power.
2. Ground Yourself
Put on your anti-static wrist strap and connect it to an unpainted metal part of your laptop or a grounded object. This prevents static electricity from damaging components.
3. Open Your Laptop
Carefully turn your laptop over. The hard drive bay is usually accessible via a specific panel on the bottom, secured by a few screws. Consult your laptop’s manual for exact instructions on how to open it. Use your screwdriver to remove the screws and your plastic pry tool to gently unclip the panel.
4. Locate and Remove the Old HDD
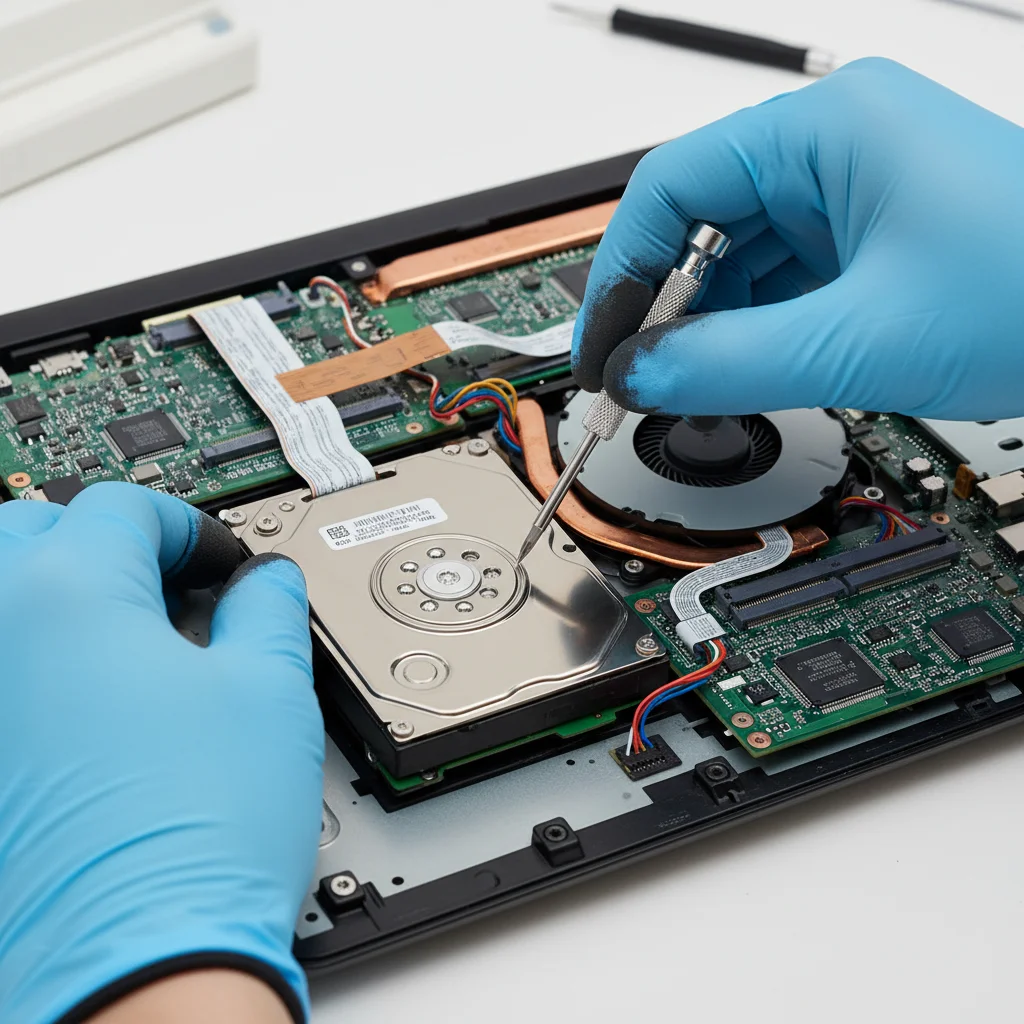
Once the panel is off, you’ll see your old hard drive. It’s usually secured by a bracket and a few screws. Unscrew the bracket, gently slide the HDD out of its SATA connector, and carefully remove it. You might need to detach a small cable that connects the drive to the motherboard.
5. Transfer Bracket (If Applicable)
Many HDDs are mounted in a plastic or metal bracket. Carefully remove the old HDD from this bracket and attach the new SSD to it. The screw holes should align perfectly.
6. Install the New SSD
Gently slide the new SSD (with its bracket, if used) into the SATA connector in the laptop’s drive bay. Ensure it’s seated firmly. Screw the bracket back into place to secure the SSD.
7. Reassemble Your Laptop
Replace the bottom panel, making sure all clips snap back into place and all screws are tightened. Reinsert the battery (if removed) and connect the power adapter.
Congratulations! The physical part of your SSD upgrade laptop is complete.
First Boot and Post-Installation Steps
With the new SSD installed, it’s time to power up your revitalized laptop.
1. First Boot
Turn on your laptop. It should boot directly into your operating system, but now significantly faster. Don’t be alarmed if the first boot takes a little longer as the system recognizes the new hardware.
2. Verify the SSD is Recognized
- Windows: Open File Explorer, right-click ‘This PC’ or ‘My Computer’, and select ‘Manage’. Go to ‘Disk Management’. You should see your new SSD listed with your operating system partition.
- macOS: Open ‘Disk Utility’ (Applications > Utilities). Your new SSD should appear in the sidebar.
3. Optimize for SSD (Windows Specific)
Windows 10/11 usually optimizes itself for SSDs automatically, but it’s good to check:
- TRIM Enabled: TRIM helps maintain SSD performance. To check, open Command Prompt as administrator and type
fsutil behavior query disabledeletenotify. If the result is 0, TRIM is enabled. - Defragmentation: DO NOT defragment an SSD. Windows will typically recognize it as an SSD and perform ‘optimize’ (which is different from defragment) instead. You can check this by searching for ‘Defragment and Optimize Drives’ in the Start menu.
- System Restore Points: While useful, frequent system restore points can consume SSD space. Consider adjusting their frequency or size.
4. Update Drivers (Optional)
While usually not necessary for an SSD, ensure your chipset drivers are up to date, as this can sometimes impact storage performance.
What to Do with Your Old HDD?
Don’t just throw away your old HDD! It can still be useful:
- External Storage: Place it in the external enclosure you used for cloning and turn it into a portable backup drive.
- Secondary Internal Drive: If your laptop has a second drive bay (e.g., in a DVD drive slot with an adapter), you could install it there for extra storage.
- Wipe and Recycle: If you no longer need it, ensure you securely wipe all data before recycling.
Troubleshooting Common SSD Upgrade Issues
While the SSD upgrade laptop process is straightforward, you might encounter minor issues. Here are some common ones and their solutions:
1. Laptop Won’t Boot After SSD Installation
- Check Connections: Power off, open the laptop, and ensure the SSD is firmly seated in its SATA connector.
- BIOS/UEFI Settings: Enter your laptop’s BIOS/UEFI (usually by pressing F2, F10, DEL, or ESC during startup). Check the boot order to ensure your new SSD is listed as the primary boot device.
- Cloning Error: If the boot order is correct, there might have been an issue during cloning. Re-attempt the cloning process or consider a fresh operating system installation on the SSD.
2. SSD Not Showing Up in Operating System
- Check Connections: As above, ensure the SSD is properly connected.
- Disk Management (Windows) / Disk Utility (macOS): Check if the drive is recognized but uninitialized or unformatted. You may need to initialize it (Windows) or erase/format it (macOS) before it appears in File Explorer/Finder.
3. Performance Not as Expected
- SATA Port Speed: Ensure your laptop’s SATA port is SATA III (6Gbps) to get the best speed. Older laptops might only have SATA II (3Gbps), which will limit SSD speed but still be much faster than an HDD.
- TRIM Enabled: Verify TRIM is enabled in Windows (as described above).
- Drivers: Ensure chipset drivers are up to date.
- SSD Health: Use the SSD manufacturer’s utility software to check the drive’s health and performance.
Most issues are minor and can be resolved with a bit of troubleshooting. Don’t hesitate to search online forums or your laptop manufacturer’s support for specific model-related problems.
The Future of Laptop Performance: Why SSDs Remain Key in 2026
Even in 2026, with advancements in CPU and RAM technology, the storage drive remains a critical bottleneck for overall system performance, especially in older machines. An SSD upgrade laptop isn’t just a temporary fix; it’s a foundational improvement that allows your existing components to operate more efficiently.
As operating systems and applications become more demanding, the need for fast storage only increases. Replacing an old, slow HDD with a modern SSD is often the most cost-effective way to extend the usable life of a laptop by several years, providing a noticeable speed boost of 50% or more in daily tasks. It’s an eco-friendly choice too, reducing electronic waste by giving older hardware a second lease on life.
Conclusion: Reclaim Your Laptop’s Speed with an SSD Upgrade
An SSD upgrade laptop is one of the most impactful and satisfying DIY projects you can undertake for your computer. It’s a relatively simple process that yields dramatic results, transforming a sluggish, frustrating machine into a responsive and enjoyable one. By following this 2026 guide, you’ve learned how to choose the right SSD, clone your data, perform the physical installation, and optimize your system for peak performance.
Say goodbye to long boot times and application delays. Embrace the speed, durability, and efficiency that an SSD brings. Your ‘old’ laptop isn’t old anymore; it’s a revitalized powerhouse, ready to tackle the demands of 2026 and beyond. Enjoy the significant performance boost and the satisfaction of a successful DIY upgrade!