Master Tech Troubleshooting: Resolve 90% of Device Problems Independently by Mid-2026

In an increasingly digital world, our reliance on technology is undeniable. From smartphones and laptops to smart home devices and complex network systems, our lives are interwoven with electronics. While this connectivity brings immense convenience, it also ushers in the inevitable: tech problems. A slow computer, a dropped Wi-Fi connection, a frozen smartphone – these are more than just minor annoyances; they disrupt our productivity, communication, and entertainment. The good news? You don’t always need to call a professional or spend hours on hold with customer support. With the right knowledge and a systematic approach, you can become your own tech guru. This comprehensive tech troubleshooting guide is designed to empower you, helping you to independently resolve 90% of your common device problems by mid-2026. Imagine the time, money, and frustration you’ll save!
The goal is digital independence. It’s about understanding the fundamental principles of how your devices work and, more importantly, how to diagnose and fix them when they don’t. We’ll break down common issues across various categories, providing actionable steps and insights that anyone can follow. By the end of this guide, you’ll not only be able to fix problems but also understand why they occur, enabling you to prevent them in the future. Let’s embark on this journey to tech mastery!
The Foundation of Effective Tech Troubleshooting: A Systematic Approach
Before diving into specific problems, it’s crucial to understand the universal principles of effective tech troubleshooting guide. Haphazardly trying solutions can often exacerbate the problem or lead to more confusion. A systematic approach ensures you cover all bases and efficiently pinpoint the root cause.
1. Define the Problem Clearly
What exactly is happening? “My computer is broken” isn’t helpful. Is it not turning on? Is it slow? Is a specific application crashing? The more precise you are, the easier it is to find a solution. Note down any error messages, unusual sounds, or lights.
2. Gather Information
When did the problem start? What were you doing just before it occurred? Have you installed new software or hardware recently? Did you drop the device? These details provide valuable context.
3. Check the Obvious First (The “Is it plugged in?” Rule)
This is perhaps the most overlooked step. Many complex-seeming problems have simple solutions. Is the power cable securely connected? Is the Wi-Fi switch on? Is the volume turned up? Don’t underestimate the power of basic checks.
4. Restart the Device
The universal fix! A simple restart can resolve a multitude of temporary glitches, memory leaks, and software conflicts. It clears the system’s current state and reinitializes everything. Always try this before moving to more complex solutions.
5. Isolate the Problem
Can you replicate the issue? Does it happen with all applications or just one? Does it affect other devices on your network? Isolating the problem helps determine if it’s device-specific, software-specific, or network-wide.
6. Search for Solutions
Once you have a clear problem definition, use search engines like Google. Type in specific error messages, device models, and symptoms. Chances are, someone else has encountered the same issue and posted a solution online.
7. Test One Solution at a Time
If you try multiple fixes simultaneously and the problem resolves, you won’t know which solution worked. This makes future troubleshooting harder. Implement one potential fix, test if the problem is gone, and if not, revert the change if possible before trying the next.
8. Document Your Steps
Keep a brief log of what you’ve tried and the results. This prevents you from repeating steps and helps if you eventually need to consult a professional.
Common Computer Problems and How to Fix Them
Computers, both desktops and laptops, are central to our digital lives. Here’s how to tackle some of their most frequent ailments using our tech troubleshooting guide principles.
Slow Performance / Lagging Computer
This is a pervasive issue that can stem from various sources.
- Restart Your Computer: Always the first step.
- Close Unnecessary Programs: Check your task manager (Ctrl+Shift+Esc on Windows, Command+Space and search for Activity Monitor on Mac) for resource-hungry applications running in the background.
- Clear Browser Cache and Cookies: Over time, your web browser accumulates a lot of data that can slow it down.
- Run a Disk Cleanup/Defragmentation (Windows): Free up space and optimize disk performance. Macs automatically manage disk space.
- Check for Malware/Viruses: Run a full scan with reputable antivirus software.
- Update Your Operating System and Drivers: Outdated software can cause performance bottlenecks.
- Check Hard Drive Space: A nearly full hard drive significantly impacts performance. Aim to keep at least 15-20% free space.
- Consider a Hardware Upgrade: If your computer is old, more RAM or an SSD (Solid State Drive) can dramatically improve speed.
Computer Freezing or Crashing (Blue Screen of Death on Windows)
These are more serious issues, often indicating software conflicts or hardware problems.
- Restart Your Computer: Again, the first line of defense.
- Identify Recent Changes: Did you install new software, update drivers, or connect new hardware? Undo these changes if possible.
- Run System Diagnostics: Many computers have built-in diagnostic tools (e.g., Windows Memory Diagnostic, manufacturer-specific tools).
- Check for Overheating: Excessive heat can cause instability. Ensure vents are clear and fans are working. Consider cleaning dust from inside the case if comfortable doing so.
- Update Drivers: Especially graphics card drivers.
- Scan for Malware: Some malware can cause system instability.
- Run a System File Checker (SFC) Scan (Windows): Open Command Prompt as administrator and type
sfc /scannowto check for corrupted system files. - Reinstall Operating System: As a last resort, a clean install can resolve deep-seated software issues, but back up your data first!
No Internet Connection on Computer
A common and frustrating problem. Refer to the network troubleshooting section below, but also consider these computer-specific checks:
- Check Network Cables: Ensure Ethernet cables are securely plugged in.
- Toggle Wi-Fi On/Off: Sometimes the wireless adapter just needs a reset.
- Forget and Reconnect to Wi-Fi Network: This can resolve IP address conflicts or corrupt network profiles.
- Update Network Adapter Drivers: Outdated drivers can cause connectivity issues.
- Run Network Troubleshooter (Windows): Built-in tools can often diagnose and fix common network problems.
- Disable VPN/Proxy: If you use one, temporarily disable it to see if it’s interfering.
Network and Internet Connectivity Issues
The internet is the lifeblood of modern tech. When it goes down, everything feels broken. This tech troubleshooting guide will help you get back online.
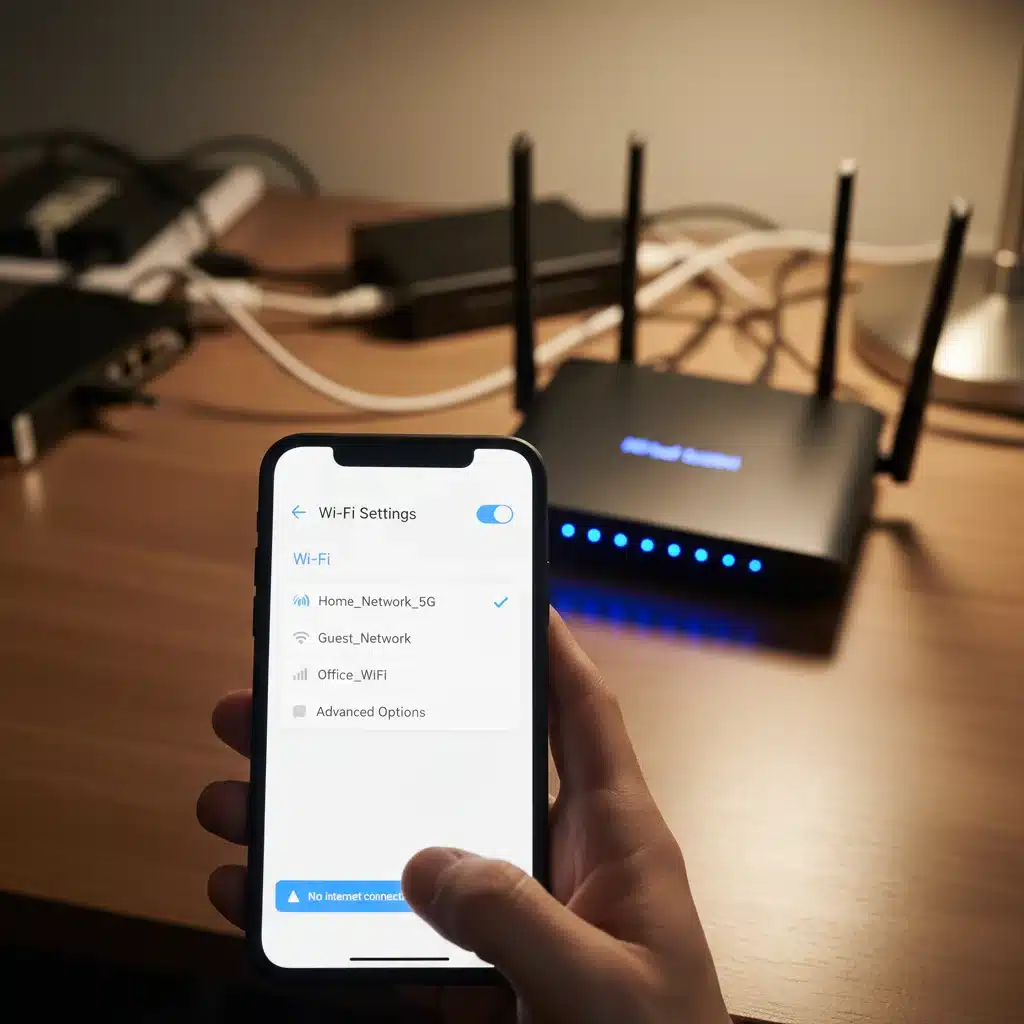
No Internet Access / Wi-Fi Not Working
- Check Modem and Router Lights: Look for indicator lights. Power, Internet, and Wi-Fi lights should typically be solid or blinking steadily. If the Internet light is off or red, the problem is likely with your ISP.
- Power Cycle Your Modem and Router: Unplug both the modem and router from power for 30 seconds, then plug the modem back in. Wait until its lights are stable, then plug in the router and wait for its lights to stabilize. This is the most common fix for network issues.
- Test with Another Device: Can your phone, tablet, or another computer connect? If only one device can’t connect, the problem is with that specific device. If no devices can connect, the issue is with your network or ISP.
- Check Cables: Ensure all Ethernet cables are securely connected to the modem, router, and your devices.
- Restart Your Device: Sometimes your computer or phone just needs a refresh to pick up the network.
- Contact Your ISP: If all lights on your modem and router appear normal, and no device can connect, the issue is likely with your internet service provider.
Slow Internet Speeds
- Run a Speed Test: Use a reliable online speed test (e.g., Speedtest.net) to verify your current speeds. Compare it to your plan.
- Minimize Bandwidth Usage: Are other devices streaming, downloading large files, or running heavy online games? Pause or limit these activities.
- Optimize Wi-Fi Signal: Move your router to a central location, away from obstructions and other electronics that can cause interference (microwaves, cordless phones).
- Change Wi-Fi Channel: Use a Wi-Fi analyzer app to find less congested channels on your router settings.
- Update Router Firmware: Check your router manufacturer’s website for firmware updates.
- Consider a Wi-Fi Extender/Mesh System: For large homes or dead zones, these can improve coverage.
- Upgrade Your Internet Plan: If you consistently get the speeds you pay for but they’re still too slow for your needs, it might be time for an upgrade.
Smartphone and Tablet Problems
Our mobile devices are indispensable. Here’s how to handle common issues with your phone or tablet, a crucial part of any comprehensive tech troubleshooting guide.
Device Freezing or Unresponsive
- Force Restart: This is different from a regular restart. The method varies by device (e.g., hold power and volume down buttons for a few seconds on many Androids, specific button combinations for iPhones). Search for “force restart [your device model]”.
- Close Background Apps: Too many apps running can consume resources.
- Clear App Cache: For individual apps causing issues, clear their cache in settings.
- Check for App Updates: Outdated apps can cause instability.
- Update Operating System: Ensure your phone’s OS is up to date.
- Check Storage Space: Low storage can severely impact performance. Delete unnecessary files and apps.
- Factory Reset (Last Resort): This will erase all data, so back up first!
Battery Draining Quickly
- Identify Battery-Hogging Apps: Go to your device’s battery usage settings to see which apps are consuming the most power.
- Reduce Screen Brightness: The screen is often the biggest power consumer.
- Disable Unnecessary Features: Turn off Wi-Fi, Bluetooth, GPS, and cellular data when not in use.
- Limit Background App Refresh: Prevent apps from constantly updating in the background.
- Use Dark Mode: On OLED screens, dark mode uses less power.
- Update Apps and OS: Software optimizations often improve battery life.
- Replace Battery: If your device is old, the battery may have degraded and needs replacement.
Apps Crashing or Not Opening
- Force Close the App: Swipe it away from your recent apps list.
- Clear App Cache and Data: In your device settings, find the problematic app and clear its cache. If that doesn’t work, clear its data (this will reset the app as if it was newly installed).
- Update the App: Check the app store for updates.
- Reinstall the App: Uninstall and then reinstall the app.
- Check Device Compatibility: Ensure your device meets the app’s minimum requirements.
- Restart Your Device: A simple reboot can often resolve temporary app glitches.
Printer Problems: The Bane of Many Offices
Printers seem to have a knack for failing at the most inconvenient times. Our tech troubleshooting guide extends to these often-frustrating peripherals.
Printer Not Printing
- Check Power and Cables: Is it plugged in? Is the USB cable connected, or is it on the correct Wi-Fi network?
- Check Paper Tray: Is there paper? Is it jammed?
- Check Ink/Toner Levels: Low or empty cartridges are a common cause.
- Clear Print Queue: On your computer, open the print queue and cancel any pending jobs. Sometimes a stuck job can prevent further printing.
- Restart Printer and Computer: Turn both off, wait a minute, then turn them back on.
- Reinstall Printer Drivers: Corrupted or outdated drivers are a frequent culprit. Download the latest drivers from the manufacturer’s website.
- Check Network Connection (Wireless Printers): Ensure the printer is connected to the same Wi-Fi network as your computer.
- Run Printer Troubleshooter (Windows): Use the built-in troubleshooter.
Poor Print Quality
- Check Ink/Toner Levels: Low ink often leads to faded or streaky prints.
- Clean Print Heads (Inkjet) / Calibrate (Laser): Most printers have a built-in utility for this in their software or control panel.
- Check Paper Type: Ensure you’re using the correct paper for your printer and print settings.
- Replace Cartridges: If cleaning doesn’t help, a faulty cartridge might be the issue.
Audio and Video Issues
Whether it’s your speakers, headphones, or display, multimedia problems can be annoying. This tech troubleshooting guide covers these too.
No Sound from Speakers/Headphones
- Check Volume Levels: Is the volume turned up on your device and the speakers/headphones themselves? Is it muted?
- Check Connections: Ensure cables are securely plugged into the correct jacks. For Bluetooth, ensure it’s paired and connected.
- Select Correct Output Device: In your computer’s sound settings, make sure the correct speakers or headphones are selected as the output device.
- Restart Device: A quick reboot can resolve temporary audio driver glitches.
- Update Audio Drivers: Outdated or corrupted audio drivers are a common cause.
- Test with Another Device: If your headphones don’t work with your computer but do with your phone, the problem is with the computer.
Display Problems (No Picture, Flickering, Wrong Resolution)
- Check Cables: Ensure HDMI, DisplayPort, or VGA cables are securely connected at both ends. Try a different cable if possible.
- Check Power to Monitor: Is the monitor plugged in and turned on?
- Restart Computer: Sometimes the display driver just needs a reset.
- Update Graphics Drivers: Outdated or corrupt graphics drivers are a very common cause of display issues.
- Adjust Display Settings: Ensure the correct resolution and refresh rate are selected in your operating system’s display settings.
- Test with Another Monitor/Cable: This helps isolate whether the problem is with the monitor, the cable, or your computer’s graphics card.
General Device Power Issues
When a device won’t even turn on, it’s a critical problem. Our tech troubleshooting guide provides steps for these scenarios.
Device Won’t Turn On
- Check Power Source: Is the device plugged into a working outlet? Test the outlet with another device.
- Check Power Cables/Adapters: Are they securely connected? Is there any visible damage to the cable or adapter? Try a different power cable or adapter if you have one.
- Check Battery (Laptops/Phones): If it’s a battery-powered device, ensure the battery isn’t completely drained. Leave it charging for a while before trying to turn it on.
- Perform a Hard Reset: This is different from a normal restart and can sometimes revive an unresponsive device. Methods vary by manufacturer (e.g., holding the power button for 10-30 seconds, removing the battery if possible).
- Look for Indicator Lights: Do any lights come on when you try to power it up? This can provide clues.

Software-Related Troubleshooting
Software is often the culprit behind frustrating tech issues. This part of our tech troubleshooting guide focuses on common software woes.
Software Installation Issues
- Check System Requirements: Does your computer meet the minimum specifications for the software?
- Run as Administrator: On Windows, right-click the installer and select “Run as administrator.”
- Disable Antivirus Temporarily: Sometimes antivirus software can interfere with installations. Remember to re-enable it afterward.
- Check Disk Space: Ensure you have enough free space for the installation.
- Download from Official Sources: Use trusted websites to avoid corrupted installers or malware.
Software Crashing or Freezing
- Restart the Software: Close the application completely and reopen it.
- Restart Your Device: A full system reboot often resolves temporary glitches.
- Check for Updates: Ensure the software is updated to the latest version.
- Clear Cache/Data (if applicable): Some applications allow you to clear their internal cache, which can resolve issues.
- Reinstall Software: Uninstall and then reinstall the problematic application.
- Check for Conflicts: Does the software conflict with other programs you have installed? Try running it in a “safe mode” if available.
Data Backup and Recovery: Your Safety Net
While this tech troubleshooting guide focuses on fixing problems, it’s equally important to protect yourself from data loss. Data backup is not a troubleshooting step, but a preventative measure that makes troubleshooting less stressful.
The Importance of Regular Backups
Imagine your hard drive fails completely. Without a backup, all your precious photos, documents, and work could be gone forever. Regular backups to an external hard drive, cloud service (like Google Drive, Dropbox, OneDrive), or a network-attached storage (NAS) device are non-negotiable.
- Cloud Backup: Convenient, accessible from anywhere, and often automated.
- External Hard Drive: A reliable local backup solution.
- NAS: For advanced users, offers centralized storage for multiple devices.
Basic Data Recovery Steps (When a Backup Isn’t Available)
If you’ve accidentally deleted a file or a drive is showing signs of failure, there are some steps you can take before resorting to professional data recovery services:
- Check Recycle Bin/Trash: The simplest solution for accidental deletion.
- Use File History (Windows) or Time Machine (Mac): These built-in tools can revert files to previous versions or restore from snapshots.
- Data Recovery Software: Tools like Recuva (Windows) or Disk Drill (Mac/Windows) can sometimes recover deleted files, but success isn’t guaranteed, especially if the space has been overwritten. Stop using the drive immediately to increase chances of recovery.
Preventative Maintenance: Avoiding Future Headaches
The best troubleshooting is preventing problems from happening in the first place. Incorporate these habits into your routine for long-term tech health, a critical aspect of mastering your tech troubleshooting guide.
- Keep Software Updated: Operating systems, applications, and drivers should always be up to date for security and performance.
- Install Antivirus/Anti-Malware: Protect your devices from malicious software.
- Use Strong, Unique Passwords: And consider a password manager.
- Regularly Clear Clutter: Delete unnecessary files, uninstall unused programs, and clear browser caches.
- Physical Cleaning: Dust can cause overheating. Gently clean vents and keyboards.
- Protect from Physical Damage: Use cases for phones, avoid dropping laptops, keep liquids away.
- Understand Power Cycles: Don’t constantly leave devices on; regular restarts are healthy.
- Educate Yourself: Stay informed about common tech scams and best practices.
When to Call for Professional Help
While this tech troubleshooting guide aims for 90% independent resolution, there will be times when professional help is necessary. Knowing when to escalate saves you time and prevents further damage.
- Physical Damage: Cracked screens, liquid spills, or dropped devices often require specialized repair.
- Complex Hardware Failures: If you’ve identified a component failure (e.g., motherboard, power supply, severely damaged hard drive) and aren’t comfortable replacing it yourself.
- Persistent, Undiagnosed Issues: If you’ve tried everything in this guide and searched online without success, the problem might be more obscure.
- Data Recovery from Failed Drives: Professional data recovery services have specialized tools for physically damaged or corrupt drives.
- Security Breaches: If you suspect your system has been deeply compromised by sophisticated malware or hacking.
Always seek out reputable technicians and get estimates before committing to repairs. Provide them with your troubleshooting log; it will save them time and potentially save you money.
Conclusion: Your Journey to Digital Independence
By diligently following the systematic approach and specific solutions outlined in this tech troubleshooting guide, you are well on your way to achieving significant digital independence. The ability to diagnose and resolve 90% of your device problems independently by mid-2026 is not just a lofty goal; it’s an achievable reality. You’ll gain confidence, save money, and reduce the frustration that often accompanies modern technology. Remember, every problem solved is a lesson learned, making you a more capable and resilient tech user. Keep learning, keep experimenting (safely!), and embrace the power of being your own tech support.